Friday, March 20, 2009

Free to a Good Noggin

Just a little Monday post....
Most of us are going through tough times, but there is always something we can do to help others. The smallest act can inspire hope. I came across a story about a man in Grand Rapids, Michigan who crochets hats and gives them away to people in need in a most interesting way. (The way he gives being interesting, not the way in which people are in need - right.) I love that t
his story comes out of Michigan, the state currently with the highest percentage of unemployment.

One of my aunts sent me a link to an article about a website called WishUponaHero.com. ABC recently covered the back-story of this website. It offers the opportunities to help a neighbor, an example from the article:
"Heroes have sent a World War II veteran back to Pearl Harbor for his 90th birthday. Several people chipped in to get a bike for a boy with down syndrome. For a girl whose house burned down, heroes gave her a dress and shoes for her senior prom. A boy with terminal cancer got a chance to meet his basketball idols."

Some people request simple things that might brighten the spirits of a loved one. I found a post from a woman requesting cards or sugar free candy to be sent to her elderly mother. Sometimes the smallest things count in big ways.

I hope this funny picture gave you a smile. I think that dog has a good head deserving of a hat. Actually, it's amazing how contemplative that dog looks as it wears such a funny hat. I'm impressed. You can find this hat and more dog items (even some people items), at BeanTownHandmade's etsy shop.

Have a great week!

Tuesday, March 17, 2009

Happy St. Patrick's Day!

A few green things in honor of St. Patrick's Day...

A necklace I made for my etsy shop, but ended up keeping for myself.


My first "real" finished knitting project.


My husband Jack and our dog Annabelle on a green lawn...a stretch I know.
It can be hard to get everyone to smile in group pictures.


I am so excited to have finished my first knitted dishcloth! I learned to purl, purl 3 together, and yarn on. The website, www.knittinghelp.com was so very helpful to me! I've also had a few friends help me along the way. I have been addicted to the knitting and crochet community www.ravelry.com, - it's where I found the free pattern for the dishcloth. It's called Little Shells Dishcloth #019.

I did goof up along the way by somehow switching the "right" side with the "wrong" side. I tried to repeat this at the end to create a similar border and make it look symmetrical. I'm constantly learning from mistakes.


Here is the dishcloth in it's natural habitat. Shhhhh, be careful not to disturb it......


In a pizza dough update, we finally got away from calzones and made actual pizza with my home made dough. What a breakthrough! I discovered that spreading the dough to a circular shape is more challenging than I expected. I don't know who first introduced the term rustic to food, but I owe them a big "Thank you!" We used canned pizza sauce, broccoli and mushrooms on my side and sausage and mushrooms on Jack's side. Broccoli on pizza is one of my favorite things!


I just may make another double batch of dough today. I love that it can be left in the fridge overnight, or frozen for up to a month. I have been trying to get better at meal planning and so far, pizza dough has been very motivating. Those carbs get me every time! The recipe can be found in a previous post and here.

Thursday, March 05, 2009

Etsy Updates

I know I usually write about food and cooking, but I have been excited about some crafty things lately. To give a brief update on the topic of food, I made another batch of pizza dough, doubling it this time. Half went to a chicken basil calzone recipe which my husband Jack tried out, and the other half went into the freezer for a future pizza - maybe this weekend. If it's good, I'll be sure to write about it. In the meantime, here is a picture of a crocheted pizza from skymagenta.

Some of you know that I have been making beaded jewelry and selling it on an online marketplace called etsy. This is a site that specializes in handmade and vintage items. It's a community that I enjoy being a part of and love to support through my purchases. It's like going to an art/craft/antique show anytime you like - what could be better?

I am almost ready to post a new necklace and I thought I would show it here first just for fun. Terrariums are really popular on etsy right now and that was my inspiration.
I found some fuzzy green beads that I couldn't resist buying. A woodland theme emerged from there. The necklace is about 38" long. I need to make a shorter version with a little gnome pendant. Ha!

I need to play around with the mushrooms a little more before I'm ready to list it in our shop, StasiaTart.
I share the shop with my friend Heather, she has some amazing vintage inspired pieces. Here is a link to our wares on etsy.

I guess my cat was feeling a little neglected during the "photo shoot".

Yesterday something very exciting happened, One of my pieces was on the front page of etsy! I have a cropped picture of what the featured sellers section on the front page looked like. My avocado green necklace is in the first column, third row down.
This really helped improve the traffic to our shop. Yesterday we received 279 visits, many from other countries including Israel, Finland, Russia, Latvia, Argentina, Kenya and more. A tool called google analytics provides this fascinating information for us. I have much to learn about how to use it.


In other crafty news, I am learning to knit. I tried very hard to resist learning a new hobby, but failed.
Do I really have time for another hobby? I guess I'm about to find out. With a little help from friends, I have picked up some needles and inexpensive yarn and brought a little more fiber into my life. Thank you to Becky for lending me "Vogue Knitting: Quick Reference" and thanks to Kathryn for introducing me to your amazing knitting aunt and her fabulous craft night. Oh and you also introduced me to www.ravelry.com Thank you!

I am about to start a scarf, wish me luck on this next adventure..
.

Wednesday, February 25, 2009

Fermentation Facination

Sometime last week (last week was a blur), I made a yeast bread. It was a pizza dough so there wasn't a dramatic rise in the oven, but I did have to allow it to rise in a covered bowl a few times before it was ready. Oh yes, I put in my time. Mixing, kneading, allowing it to rise for 90 to 120 minutes, kneading again, and finally allowing it to rise for 45 minutes takes some planning! I loved the thought of working with something that is alive; I feed it, and eventually it will feed me. It's amazing how much the dough changes physically, becoming more elastic as I knead it, then softening up as it's left to rise. I made the dough one night while Jack cooked dinner and we used the dough for calzones the next night. They were quite yummy, I must say. I think it was the cheese and broccoli mixture - and the homemade bread. I'll post the pizza dough recipe first:

Pizza Dough


* Recipe by Johanne Killeen and George Germon from Food & Wine

* ACTIVE: 25 MIN
* TOTAL TIME: 2 HRS 45 MIN
* SERVINGS: Makes enough for six 8-inch pizzas

Ingredients

1. 1 envelope active dry yeast
2. 1 cup warm water
3. Pinch of sugar
4. 2 1/4 teaspoons kosher salt
5. 3 tablespoons whole wheat flour
6. Extra-virgin olive oil

7. 2 1/2 to 3 cups unbleached all-purpose flour

Directions

1. In a large bowl, mix the yeast with the water and sugar and let stand until foamy, about 5 minutes. Stir in the salt, whole wheat flour and 1 tablespoon of olive oil. Gradually add 2 cups of the all-purpose flour, stirring with a wooden spoon until the dough is fairly stiff. Turn the dough out onto a well-floured work surface and knead, gradually adding as much of the remaining all-purpose flour as necessary, until it is smooth, elastic and no longer tacky, 5 to 6 minutes.
2. Transfer the dough to a lightly oiled bowl and brush the surface with olive oil. Cover the bowl with plastic wrap and let the dough rise in a warm, draft-free place until it doubles in bulk, 1 1/2 to 2 hours.
3. Punch down the dough and knead it lightly, then return it to the bowl. Cover the bowl and let the dough rise again until doubled in bulk, about 45 minute
s. Punch down the dough again and use or refrigerate.

Make Ahead

The Pizza Dough can be refrigerated overnight or frozen for up to 1 month. Let the dough return to room temperature before using.

I really should have made more and thrown a portion in the freezer. I know for next time. So go make some pizza, or maybe a batch calzones.

Corn and Broccoli Calzones
From EatingWell Magazine July/August 2007

Makes 6 calzones

ACTIVE TIME: 30 minutes

TOTAL TIME: 45 minutes

EASE OF PREPARATION: Easy

1 1/2 cups chopped broccoli florets
1 1/2 cups fresh corn kernels (about 3 ears; see Tip)
1 cup shredded part-skim mozzarella cheese
2/3 cup part-skim ricotta cheese
4 scallions, thinly sliced
1/4 cup chopped fresh basil
1/2 teaspoon garlic powder
1/4 teaspoon salt
1/4 teaspoon freshly ground pepper
All-purpose flour for dusting
20 ounces prepared whole-wheat pizza dough (see Tip), thawed if frozen
2 teaspoons canola oil

1. Position racks in upper and lower thirds of oven; preheat to 475°F. Coat 2 baking sheets with cooking spray.
2. Combine broccoli, corn, mozzarella, ricotta, scallions, basil, garlic powder, salt and pepper in a large bowl.
3. On a lightly floured surface, divide dough into 6 pieces. Roll each piece into an 8-inch circle. Place a generous 3/4 cup filling on one half of each circle, leaving a 1-inch border of dough. Brush the border with water and fold the top half over the filling. Fold the edges over and crimp with a fork to seal. Make several small slits in the top to vent steam; brush each calzone with oil. Transfer the calzones to the prepared baking sheets.

My friend Ben is currently reading Wild Fermentation and I am excited to see how he likes it. I would love to learn more about fermentation. I need to read up on beer too, but that is another post...


I didn't take a picture of my calzones, but no matter, I will simply share two of my favorite food related items on etsy: The colorful cards by TommyMamma featuring everyone's favorite kitchen tool can be found by clicking here.


Perhaps you prefer a smaller version of the mixer. CupCakeTree makes the cutest stamps, click here to see were you can buy this hand mixer stamp and if you roam around her shop, you'll find other wonderful kitchen item stamps too.

Now this is not related to food, but I found a fun give-a-way on another blog. All you have to do is leave a comment to be entered in a drawing for a handmade clutch purse. The drawing will be on Friday, the 27th and there are only 3 entries so far. That's good odds! Click here to check it out. The author of the blog has an etsy shop with handmade bags.

Whew! That's all I've got for now - thanks for reading!

Friday, November 28, 2008

A Thanksgiving Pictorial and Two Recipes


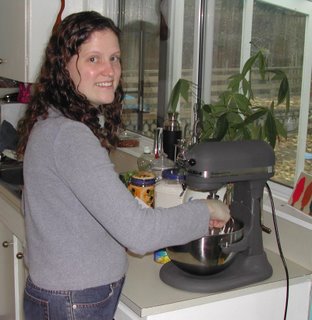
Amy, Molly, and Me in the kitchen.


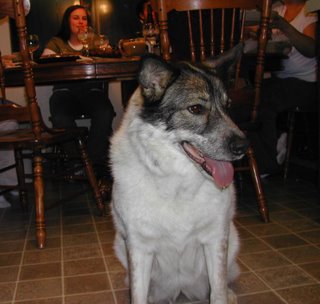
Annabelle and Jack relaxing.


The mantel that Amy put together.


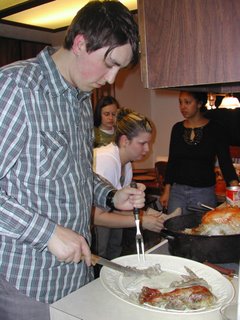
Jack doing the carving.


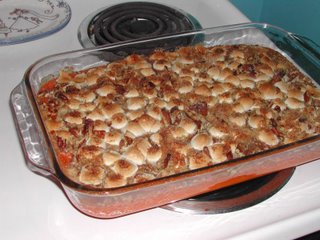
Jack's Sweet Potato Lovin'. From Cooking Light, November, 2006.

Yield

16 servings

Ingredients

  • Potatoes:
  • 2 1/4 pounds sweet potatoes, peeled and chopped
  • 1 cup half-and-half
  • 3/4 cup packed brown sugar
  • 1 teaspoon salt
  • 2 teaspoons vanilla extract
  • 2 large eggs
  • Cooking spray

  • Topping:
  • 1 1/2 cups miniature marshmallows
  • 1/2 cup all-purpose flour (about 2 1/4 ounces)
  • 1/4 cup packed brown sugar
  • 1/4 teaspoon salt
  • 2 tablespoons chilled butter, cut into small pieces
  • 1/2 cup chopped pecans, toasted

Preparation

Preheat oven to 375°.

To prepare potatoes, place potatoes in a Dutch oven, and cover with water. Bring to a boil. Reduce heat, and simmer 20 minutes or until very tender. Drain; cool slightly.

Place potatoes in a large bowl. Add half-and-half, 3/4 cup sugar, 1 teaspoon salt, and vanilla. Beat with a mixer at medium speed until smooth. Add eggs; beat well (mixture will be thin). Scrape mixture into a 13 x 9-inch baking dish coated with cooking spray.

To prepare topping, sprinkle miniature marshmallows over top of casserole. Lightly spoon flour into a dry measuring cup; level with a knife. Combine flour, 1/4 cup sugar, and 1/4 teaspoon salt in a medium bowl. Cut in butter with a pastry blender or 2 knives until mixture resembles coarse meal. Stir in pecans, and sprinkle over potato mixture and marshmallows. Bake at 375° for 30 minutes or until golden brown.


Molly hearts mashes potatoes!


Jonathan takes on my Gingered Pumpkin Pie. Recipe from Cooking Light, November, 2001.

Yield

8 servings (serving size: 1 wedge)

Ingredients

  • 1/2 (15-ounce) package refrigerated pie dough (such as Pillsbury)
  • 10 gingersnap cookies
  • 2 tablespoons sugar
  • 1 tablespoon all-purpose flour
  • 2 tablespoons chilled butter, cut into small pieces
  • 3/4 cup sugar
  • 1 1/2 teaspoons ground cinnamon
  • 1/2 teaspoon ground ginger
  • 1/4 teaspoon salt
  • 1/4 teaspoon ground nutmeg
  • 1 (15-ounce) can unsweetened pumpkin
  • 1 (12-ounce) can evaporated fat-free milk
  • 1 large egg
  • 3 large egg whites

Preparation

Preheat oven to 350°.

Roll dough into a 12-inch circle; fit into a 10-inch deep-dish pie plate. Fold edges under, and flute. Freeze 30 minutes.

Place cookies, 2 tablespoons sugar, and flour in a food processor; process until cookies are ground. Add butter; pulse until crumbly.

Combine 3/4 cup sugar and remaining ingredients; pour into prepared crust. Bake at 350° for 35 minutes. Sprinkle crumb mixture over pie; bake an additional 20 minutes or until center is set. Cool to room temperature on a wire rack.


Jack, Annabelle and I had a great Thanksgiving. Thank you Molly and Amy for hosting!

Bridging the Gap

Well, it has been a while since I last posted. Jack and I had an eventful summer with some camping, backpacking, a trip to Alaska, and three weddings! There were some adventures in food for sure, but no time to record them.

I thought I could start catching up by starting with Halloween. Jack loves to dress up for this holiday so he went to work as a cow. I waited until we went to our neighbors for a little party that evening. I was a milkmaid. I think Jack looks very handsome in black and white don't you?

Both Jack and I had Halloween potlucks at work, so I baked molasses cookies or each of us to take in. As we sat together on the bus for our commute to work, I stared at the cookies on my lap (they were in a plastic bag). I realized that they could be the perfect accessory for Jack's costume - cow patties! He loved the idea and put a little sign near his cookies that read, "Jack's Cow Patties - Fresh!"


Here is the recipe for the
Molasses Cookies from Cooking Light, October, 2005:

Yield

4 dozen (serving size: 1 cookie)

Ingredients

  • 1 cup packed brown sugar
  • 1/2 cup vegetable shortening
  • 1/2 cup molasses
  • 1 large egg
  • 2 1/4 cups all-purpose flour (about 10 ounces)
  • 2 teaspoons baking soda
  • 1 teaspoon ground cinnamon
  • 1/2 teaspoon ground cloves
  • 1/2 teaspoon ground ginger
  • 1/4 teaspoon salt
  • 1/2 cup water
  • 1/4 cup granulated sugar
  • Cooking spray

Preparation

Combine brown sugar and shortening in a large bowl; beat with a mixer at medium speed until light and fluffy. Add molasses and egg; beat well. Lightly spoon flour into dry measuring cups; level with a knife. Combine flour and next 5 ingredients (through salt), stirring with a whisk. Add flour mixture to sugar mixture; beat at low speed just until blended. Cover and freeze 1 hour.

Preheat oven to 375°.

Place water in a small bowl. Place granulated sugar in another small bowl. Lightly coat hands with cooking spray. Shape dough into 1-inch balls. Dip one side of each ball in water; dip wet side in sugar. Place balls, sugar side up, 1 inch apart, on baking sheets coated with cooking spray. Bake at 375° for 8 minutes. Remove from pans; cool on wire racks.

Chewy molasses goodness!

I also have been very busy working to set up a jewelry shop at etsy.com. My store features beaded jewelry and loose beads and is located: www.stasiatart.etsy.com
You can see a sneak photo preview to the right of this post too.

Thursday, March 06, 2008

Working up an Appetite

Jack and I spent a long weekend in Bend, Oregon recently. Our friends Tiffany and Ryan have access to a timeshare close to Mount Bachelor and they invited us to enjoy the snow with them. Ryan guided us up Tumalo Mountain on Friday on a shoe shoeing adventure. There was more straight up to the route than I had bargained for, but the view from the top was well worth it.

Saturday was for snowboarding. Now, I was raised in Michigan, we had plenty of snow, but the slopes do not compare to what the West has to offer. So, I stayed at the timeshare to relax and...cook! I wanted to serve the snowboarders something savory and delicious after their long day on the mountain. I had the latest issue of Cooking Light with me and I noticed this recipe on the last page: Cabernet-Braised Beef Short Ribs. The 3 1/2 hours in the oven appealed to me because I wanted to spend this day to myself making a nice meal and taking it easy. The slow and low way of cooking is a favorite technique because you can't help but end up with tender pieces of meat when you're done. Also, you can never go wrong with a recipe that calls for wine; once that bottle has made its contribution to the recipe, what remains is fair game.
I had never worked with short ribs before and was surprised to see how much they plumped up as they cooked. I served the ribs on a bed of egg noodles and we had asparagus with melted butter as a side. Asparagus is Jack's favorite vegetable and I am happy to see that it is coming back in season again--I love it too. I forgot to take pictures as I was cooking, so Tiffany was kind enough to model what was left.

For dessert I tried something that I've been meaning to make for a long time: an apple galette. This is a simple, rustic tart that is easy to make. I absolutely loved the smell of cooking apple slices in melted butter, that experience rates a close second to the view from Tumalo Mountain. Mmmm.

Tuesday, November 06, 2007

Sometimes You Have to Look Below the Surface

At the end of October, The Splendid Table's weekly recipe, "Weeknight Kitchen", arrived in my inbox. In keeping with the fall season, a root vegetable was the focus. I had not yet tried one of these suggested recipes, but Celery Root Soup with Blue Cheese felt like the recipe to start with. I've never tasted celery root and I was up for trying something new. Also, when it comes to autumn, I find it hard to turn down food that celebrates this season. The recipe is from Cooking with Shelburne Farms: Food and Stories from Vermont by Melissa Pasanen with Rick Gencarelli.

Finding a decent celery root took two tries and the price of $4.99 a pound gave me an appreciation for this ingredient before I even tasted it. The voice behind The Splendid Table, Lynne Rossetto Kasper, advised me to look for a root that is firm and as smooth as possible. She also recommended going with high quality blue cheese. I opted for a Pacific Northwest favorite: Gorgonzola.

Celery root is a big, ugly bulbous root with smaller roots growing out of the bottom. Peeling it is not much different from peeling a potato, but eliminating the smaller roots felt a little counterintuitive. As I cut the small roots away, I began to worry about just how much weight I was losing and how the loss would affect the taste of the soup. I decided to add my flavorful cheese slowly and pressed forward. The rest of the directions were easy enough, I had to simmer the celery root in milk for about 30 minutes and then blend it with the cheese and chicken stock. Lemon juice and a topping of crumbled cheese made the meal complete.

I loved the earthiness of the delicate celery flavor and the cheese was a wonderful compliment. The taste of the soup ended with a little bitterness and it seemed a little dry. This wasn't so noticeable at first, but after a while I decided to add oyster crackers. I think that my bowl of soup would have made a better cup of soup for me. I'm so glad I tried celery root an I would definitely try it again.

Wednesday, October 24, 2007

It's Been a Long Time

It's been an embarrassingly long time since I shared some thoughts on food. At the time of my last post, I think that spring was approaching and um, that is the time when the garden steals my attention. I grow crunchy snow peas before I prepare them and finally eat them. It's a very long process so you can understand just how busy I was. As spring turns to summer Jack conveniently becomes interested in grilling and I'm still gardening. Most of the time anyway. I don't think this excuse is panning out as well as I'd hoped. Uh, Let's move on.

September and October have been very interesting. I did a bit of traveling for work and had a few adventures in food. (I travel to schools to train teachers to use the program my company produces.) My boss accompanied me on my first trip. We spent two days in Lake Jackson, Texas, just south of Houston. The first night Janet and I ended up eating some classic fast food at Whataburger. Their signature orange and white roof had caught my eye from the airplane that morning and I was curious. The burgers were quite large as Janet demonstrates. They were also delicious with the fries following suit. We both easily recommend you try a Whataburger if given the chance.

Janet and I are big fans of barbecue. Texas favors beef to pork and I was looking forward to tasting this approach. I asked an administrative assistant at the school for recommendations. I couldn't quite tell if she was amused or flattered by my request, but she lead us to the yummy Brian's BBQ. I love the old-school sign!! A large steer is located atop the roof above the entrance; it's very serious. The only beef item on the menu that day was brisket. The meat was tender and the sauce was sweet and vinegary. Good stuff, so good I kind of forgot what my sides were.

It's late autumn now and this time of year puts me in the mood to cook and bake. Both kind of hit me at once, but don't fret, I can handle it. My Cooking Light magazines are thicker, stuffed with more recipes than usual to keep me inspired. Cooking Light isn't my only inspiration; tomorrow I plan to make Celery Root Soup with Blue Cheese from "Cooking with Shelburne Farms: Food and Stories from Vermont" by Melissa Pasanen with Rick Gencarelli. This recipe came to me by way of an email subscription the radio show The Splendid Table offers called Weeknight Kitchen. I hope I'll have time to write about it by the end of the weekend.

Thursday, February 22, 2007

Collard Greens Got Nothing On Me

Wednesday night was a fine night indeed, for it marked our third Pioneer Organics delivery. A new bin full of organic produce had been placed on our porch (perhaps by magic farm elves) while we were at work. The Friday before, I was looking at the list of food that Pioneer Organics had emailed to me with my studying-to-be-a-dietitian-friend Kathryn. The company sends a list of what they could deliver and the collard greens where intimidating me a little. I was considering striking them from the list and replacing them with the familiar spinach when Kathryn stepped up and encouraged me to try them. I believe her words were something like, "They're quite good!" Well it doesn't take much to sway me and I do like to try new things, so collard greens made the journey to our porch. But I didn't have a plan for them. Luckily Pioneer Organics supplies a few suggested recipes with each order. I made Greens with Roast Potatoes as a side dish to go with Oven Fried Chicken. Oh, the Parmesan and potatoes and collard greens smelled and tasted so wonderful together. Roasting really brings out flavors like no other technique.

Greens with Roast Potatoes


from Pioneer Organics
Servings: 4
Time: 1 hour
2 tablespoons extra virgin olive oil
½ onion, sliced into half moons
1 bunch collard greens, stems removed and cut into thin ribbons
water or vegetable stock
salt and freshly ground black pepper
1 pound Yukon gold potatoes, or red potatoes, cut into cubes
2 cloves garlic, minced
2 tomatoes,
diced red pepper flakes or cayenne pepper
½ cup freshly grated Parmesan cheese, or more (optional)

Preheat oven to 425°F. In a large shallow saucepan, heat olive oil over medium high heat. Add onion and cook until it begins to soften. Add collard greens, water or vegetable stock--enough to come ½” up the side of the pan. Add a pinch of salt and black pepper. Stir, turn the heat down, and cover. Check periodically to make sure nothing is sticking, and that there is still a small amount of liquid in the pan. Cook for about 5 minutes. Place the potatoes in a roasting pan and drizzle with a light coating of olive oil and a sprinkle of salt and pepper. Cook in oven for 25 to 40 minutes, until almost soft. Remove potatoes from oven, and add cooked greens, garlic and tomatoes. Add red pepper flakes or cayenne pepper, if using. Toss to combine. Sprinkle Parmesan cheese over the top, if using. Turn oven down to 400°F. Return pan to oven and cook until cheese is melted and brown around the edges.
I'm going to publish the Oven Fried Chicken recipe too. As far as I can tell, it's legal as long as credit is given. This has become a standard in our household and it's just too good not to share.

Oven-Fried Chicken
From Cooking Light

1 cup low-fat buttermilk
2 large egg whites, beaten
1 cup all-purpose flour (about 4 1/2 ounces)
1/3 cup cornmeal
1 teaspoon salt, divided
3/4 teaspoon freshly ground black pepper
1/4 teaspoon ground red pepper
2 chicken breast halves, skinned (about 1 pound)
2 chicken thighs, skinned (about 1/2 pound)
2 chicken drumsticks, skinned (about 1/2 pound)
2 tablespoons canola oil
Cooking spray

Preheat oven to 425°.

Cover a large baking sheet with parchment paper. Combine buttermilk and egg whites in a shallow dish; stir well with a whisk. Combine flour, cornmeal, 1/2 teaspoon salt, black pepper, and red pepper in a separate shallow dish; stir well. Sprinkle chicken evenly with remaining 1/2 teaspoon salt. Dip chicken in buttermilk mixture; dredge in flour mixture.

Heat oil in a large nonstick skillet over medium-high heat. Add chicken to pan; cook 4 minutes on each side or until lightly browned. Place chicken on prepared baking sheet; lightly coat chicken with cooking spray. Bake at 425° for 30 minutes or until chicken is done.

Yield: 4 servings (serving size: 1 chicken breast half or 1 drumstick and 1 thigh)

NUTRITION PER SERVING
CALORIES 450(28% from fat); FAT 13.8g (sat 2.5g,mono 6.1g,poly 3.6g); PROTEIN 43.5g; CHOLESTEROL 109mg; CALCIUM 88mg; SODIUM 803mg; FIBER 1.7g; IRON 3.2mg; CARBOHYDRATE 35.3g

In non-related news, I spent my 30th Birthday at the Northwest Flower and Garden Show. It was super-fantastic! In the interest of comfortable gardening footwear I bought a pair of crocs. Jack made me promise to never wear them in public. Not a problem. They're great for all the standing that cooking requires. The photo features my favorite comfy P.J.s. (Thanks mom)

Tuesday, February 06, 2007

Picture Post

I have not done any noteworthy cooking this past week, but I do have a handful of fun pictures from the past few months. I made some treats for Annabelle from, "The Ultimate Dog Treat Cookbook" by Liz Palika. Annabelle scafed down the Crispy Cheese Circles from page 38.


Sometime in December, I made my first yeast bread. It was a rustic loaf of rosemary focaccia. I took the opportunity to tame a tiny section of our rosemary bush from the front garden. I should look up more recipes that use rosemary, my supply is quite healthy. Jack and I enjoyed the bread with sun-dried tomato olive oil. (Red wine too.) The saltiness on top of the bread is wonderful!


Sunday, January 28, 2007

Sunny Morning


Seattle is enjoying its first sunny weekend in a long time! There is new growth on the paperwhite bulb I planted in early January. It feels like spring might just be around the corner, for this weekend anyway. I have recently bought another container for planting some hyacinths once they become available. Last year I fell in love with their scent. It started with one perfuming the kitchen and when that faded, I replaced it. I ended up purchasing three in succession. Those bulbs are in the yard now. Hopefully, they will visit us again this spring.

Saturday morning Jack woke up with the cough he has had for about a week now. Enough was enough, he was ready to go to the doctor. I made arrangements and then started thinking about breakfast. We had just over an hour before the appointment. Hmmmm... I have really been into grapefruit lately. I recently picked up the February edition of "Eating Well". There is a whole section on citrus; savory and sweet. I decided to make Jack and I the dessert "Grapefruit Brulee"(p. 57) for a quick breakfast before his trip to the doctor. You may think that I am quite daring to attempt a brulee in a short amount of time. You may also think I am a little silly for serving a dessert for breakfast. Fear not. Although I respect the magazine, I think "brulee" was used loosely and this is a dessert on a diet.

Grapefruit Brulee
"Eating Well" Feb 2007
Bruce Weinstein & Mark Scarbrough

3 large pink or ruby-red grapefruits
6 tablespoons packed dark brown sugar
1 tablespoon of butter, cut into tiny pieces
1/4 teaspoon ground cinnamon
1/4 teaspoon freshly grated nutmeg

1. Position oven rack about 5 inches from broiler; preheat broiler
2. Slice the stem end and opposite end off each grape fruit. Stand the grape fruit, one cut end down, on a work surface. Cut off the rind and pith with a sharp knife, making sure to remove all the white pith. Cut each fruit into 4 rounds, about a half inch thick, by making slices parallel to the ones you made on the top and bottom.
3. Place the slices in a large baking pan in a single layer. Top each with 1 1/2 teaspoons brown sugar, dot with butter and sprinkle with a pinch of cinnamon and nutmeg.
4. Broil the grapefruit until bubbling and starting to brown, 6 to 8 minutes. Drizzle pan juices over each serving.

MAKES 6 SERVINGS, 2 SLICES EACH

Jack found a warm grapefruit to be a little odd. He wondered if he might like it better cold. I, on the other hand, loved this dish. The membranes around each section of the fruit take a little navigating, but it's worth it. The butter, cinnamon, nutmeg, and sugar go nicely with the tart, sour grapefruit.

The doctor said Jack had a cold that was heavy on the cough. Maybe the vitamin C from breakfast will help him out. I guess I should take a look at some chicken soup recipes next.

Saturday, January 20, 2007

Arsenal of Family Recipes

Last week Jack had a brilliant idea. He employed his love of cooking breakfast to host a pancake playoff breakfast last Sunday. Eleven of us gathered around the television to watch a very close game in which our charismatic Seahawks lost to the Chicago Bears. Yes, I did use the term "charismatic"to describe a pro football team. We've got nice guys Josh Brown, Matt Hasselbeck, and Shaun Alexander. In fact, once you've seen Shaun Alexander's smile, you'll realize there's no argument. Ah, I digress. What to do when your team must exit the playoffs? Employ your best emotional eating techniques and enjoy the food. My humble opinion tells me there is no better way to get over that 49 yard field goal in sudden death overtime, making the score 27-24. Jack's blueberry pancakes were in our bellies to aid in adjusting to the end of the season.
For my part, I sought out my best Midwest brunch recipes; Cheese Strata and Sticky Buns. I usually try to eat healthy, but I bring out these recipes for special get-togethers and holidays just as my extended family does. When you're part of a 20-member, Midwest family with German-Catholic roots you can expect congregating for nearly every birthday and first communion. This presents many opportunities for testing recipes on a broad range of tastes and ages. Winners will emerge. Since I've moved to the West coast, my mother has been supplying me with hand written or typed instructions for the tried and true, the food of my memories.

Cheese Strata
Grandma Lucile Bohr

1/2 cup Margarine or butter
10 - 12 Slices of bread, trim crusts and cut/tear into cubes
1 cup Crab meat, canned or frozen, drained
1/2 cup Old English cheese, cut into cubes (I doubted this cheese could be found in Seattle, so I used the almighty Cheddar)
4oz of Canned or fresh mushrooms
5 Eggs
2 cups of milk
Salt, pepper, dry mustard, red pepper (I guessed a teaspoon of the first 3, & a conservative 1/2 teaspoon of the red pepper)
I added cubed red bell pepper (1 small pepper)

Melt butter in a 9 x 13" pan. Put half of bread cubes and cheese cubes in pan. Sprinkle crab meat and mushrooms over top. make another layer of bread and cheese cubes. Combine eggs, milk, and seasonings; pour over all. Let stand overnight in fridge. Bake at 350 about 1 hour. Serves 8 to 10.

For variation in tastes and budget, try substituting ham, chipped beef, tuna, shrimp, or lobster for crab.

Sticky Buns
Kris Bauman

2 dozen Frozen dinner rolls
1 tsp Cinnamon
1 cup Nuts
1/2 cup Brown sugar
1/2 cup Sugar
1 (3.5 oz) box Butterscotch pudding (not instant)
1/2 stick Butter

Grease a 9 x 13" pan well. Melt butter and brown sugar together and spread on bottom of pan. Sprinkle nuts, then dry pudding mix. Mix white sugar and cinnamon together and sprinkle on top of mixture in pan. Place dinner rolls in pan. Cover with foil and let stand in a warm place overnight.
Bake uncovered, at 350 four about 30 minutes. Invert on plate immediately.

Monday, January 01, 2007

Holiday Pictures

This is a quick pictorial post.


Christmas Eve a Karen's. This was her yummy crab cheese dip with a cute presentation.
Me cooking Roast Beef Tenderloin with Caramelized Onion and Mushroom Stuffing from the Cook's Illustrated December 2006 issue.

There' s some spinach in there too.
A silly picture Annabelle going for a gift bone. Thanks mom and dad!

Getting Steamy in the Kitchen

I am back after a long absence - whew! There were the holidays of course and a new job before that. I have been cooking all along, but not from the "Asian" cookbook. It's time to get back into the fish sauce and garlic. In November, I made "Steamed Fish and Green Onions with Ginger" from page 58. My mouth still waters when I remember this meal. We splurged on the fish; halibut for $15.99 a pound - oh, but it was worth it. To me, halibut tastes buttery, yet clean, almost crisp. It has a refreshing quality to it that makes me feel a little healthier for eating it. The ginger and green onion flavors in the sauce add to that satisfying, yet healthy experience. This kind of meal is great after a few nights of heavy eats. In the past, Jack and I have made a tofu udon noodle dish with ginger, garlic and green tea leaves used like a spice when we feel like we need a "cleansing". I can add this recipe to that category.
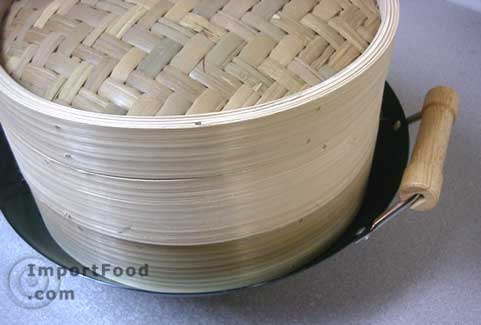
I had a certain challenge as I prepared this meal. The fish is mean to to be steamed in a bamboo steamer. I have admired bamboo steamers from afar. I used to eat dim sum at Pike's Market on my lunch break when I worked downtown. The vendor had large bamboo steamers for the steamed meat-filled dumplings and buns. My Christmas list and time constraints did not allow me to buy one before making this meal. Our limited storage in the kitchen makes me hesitate as well. Anyway, I had to come up with a makeshift version of the traditional steamer. I filled my stir-fry pan with a bit of water and placed a metal steamer in the pan. The fish is instructed to be placed on top of a bed of green onions on a plate. The bed of green onions was simple, but what a way to add flavor! I placed the plate on the metal steamer and covered the setup with a frying pan. I believe this will be the closest to mechanical engineering that I will ever get.

Sunday, November 26, 2006

Thanksgiving Pictures

I am grateful for a long weekend and friends and family to spend it with. I wish I could have been with my Michigan family as well, maybe next year. Jack, Annabelle, and I went to his mother's place for the holiday. He stood up to the challenge of making sweet potato casserole and pecan pie. I took on spinach and artichoke dip and a super sugary whipped fruit dip. The fruit dip recipe is from Paula Dean so it's very rich. Not to worry - absolution is built right in with the fruit that delivers the sugary goodness. Get the recipe here. (I think it goes as "French Cream" in this recipe.)

Our friends Kathryn and Albert and Jack's mom, Karen came over the day after Thanksgiving. We finished some of the leftovers, (I made a turkey casserole) and watched "Gone with the Wind". It was a cozy evening spent watching a great film.

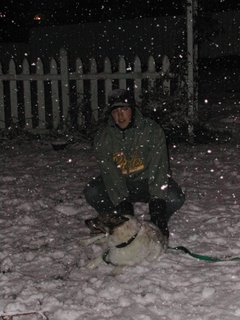
Now the weekend is coming to a close with snow, about four inches so far. This is not normal for Seattle. I was happy to discover my Michigan driving skills were still intact earlier today.

I have some pictures to share...